How to create group emails in outlook
Email communication is at the heart of modern business and collaboration. Managing multiple recipients for specific purposes can be a challenge, especially when you have to send the same message to a group of people regularly. This is where creating group emails in Outlook becomes incredibly useful. In this guide, we’ll walk you through the step-by-step process of how to create group emails in outlook, making your communication more efficient and organized.
Step 1: Open Microsoft Outlook
Launch Microsoft Outlook on your computer. Ensure you are signed in with your email account, as you’ll need access to your contact list to create a group email.
Step 2: Navigate to the People Tab
Click on the “People” or “Contacts” tab on the bottom left corner of the Outlook window. This will open your contacts and address book.
Step 3: Select “New Contact Group”
In the top toolbar of the Contacts window, select “New Contact Group” or “New Contact List,” depending on your Outlook version.
Step 4: Name Your Group
A dialog box will appear, prompting you to name your group. Choose a descriptive name that reflects the purpose of the group. For example, if you’re creating a group for the marketing team, name it “Marketing Team” for clarity.
Step 5: Add Members to Your Group
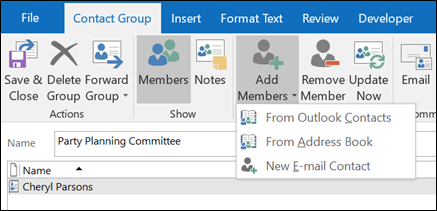
To add members to your group email, click on the “Add Members” button. You can choose to add members from your Outlook contacts, your address book, or by entering their email addresses manually.
- From Outlook Contacts: Click on “From Outlook Contacts” to select contacts from your existing list. A window will open, allowing you to check the contacts you want to add to the group. Click “Members” after selecting them.
- From Address Book: If your contacts are stored in an address book, you can click “From Address Book” to select members. Choose the contacts you wish to add and click “Members.”
- Manually: To add members manually, click “New Email Contact” and enter the contact’s name and email address. Click “Add” for each member you want to include.
Step 6: Review and Save Your Group
Once you’ve added all the members you want in your group, review the list of members to ensure accuracy. You can remove members by selecting their names and clicking the “Remove” button. When satisfied, click “OK” or “Save & Close,” depending on your Outlook version.
Step 7: Compose and Send Group Emails
Now that your group is created, you can easily send emails to all its members. When composing a new email, simply type the name of your group in the “To” field, and Outlook will suggest your group. Select it, write your email, and hit “Send.”
Additional Tips:
- Updating Your Group: Over time, you may need to add or remove members from your group. To update the group, go to the “People” or “Contacts” tab, find your group, and click “Edit” or “Open.” You can then make the necessary changes.
- Group Permissions: Depending on your Outlook settings, you may need permission to create or edit group emails. Ensure that you have the necessary permissions if you encounter issues.
- Naming Conventions: Use clear and concise names for your groups to avoid confusion. It’s also helpful to categorize groups by department, project, or team.
- Regular Maintenance: Regularly review and update your groups to ensure they stay current and effective for your communication needs.
Creating group emails in Outlook is a straightforward process that can greatly simplify your email communication, especially when dealing with large groups of recipients. By following these steps and best practices, you can enhance your productivity and streamline your email interactions, making collaboration with teams and contacts more efficient than ever.
How to Create Group Emails in Outlook: A Step-by-Step Guide
Customizing Group Details:
- Group Description: After creating a group, you can add a description to provide additional context for its purpose or goals. This can be helpful for members who may not be familiar with the group’s intended use.
- Group Photo: You can also add a group photo or logo to make it easily recognizable in your contacts list. This visual identifier can help members quickly locate and use the group when sending emails.
Managing Group Email Addresses:
- Group Email Alias: Groups in Outlook often have a unique email address associated with them. For example, if your group is named “example,” it might have an email address like “example@yourdomain.com.” Members can send emails directly to this address to reach everyone in the group.
- Renaming Groups: If you ever need to change the name of a group, you can do so by going back to the group’s properties and editing its name. The group’s email alias will also update to reflect the new name.
Group Email Etiquette:
- Clear Communication: When using group emails, ensure that your messages are clear and relevant to all members. Avoid sending unnecessary emails or messages that don’t pertain to the entire group.
- Reply All: Be mindful when using the “Reply All” feature. It’s often best to reply only to the sender if your response is not essential for the entire group.
- Subject Lines: Use descriptive subject lines that summarize the content of your email. This helps recipients quickly understand the purpose of the email.
Group Email Security:
- Permissions: Depending on your organization’s settings, you may have varying levels of permission to create and manage groups. Be aware of these permissions to avoid any issues with group creation and modification.
- Sensitive Information: Exercise caution when sending emails to groups, especially if the email contains sensitive or confidential information. Always double-check the recipient list to ensure it includes only the intended members.
Group Email Best Practices:
- Regular Updates: Periodically review your groups and their members to ensure they stay up to date. Remove members who are no longer part of the group or add new ones as needed.
- Training: If you’re managing groups for a team or organization, consider providing training or guidelines on how to use group emails effectively. This can help maintain a more organized and productive email environment.
Creating group emails in Outlook is a valuable tool for improving communication and collaboration within teams, departments, or specific project groups. By following these steps and considering additional customization and etiquette tips, you can make the most of this feature to enhance productivity and streamline your email communication in both personal and professional settings.
Advanced tips and strategies for managing group emails effectively in Outlook
Effectively managing group emails in Outlook requires a combination of advanced strategies and the use of complementary tools and features. By implementing these strategies and staying adaptable to the evolving needs of your group, you can maximize the efficiency and effectiveness of group email communication. Group emails, when managed well, become a powerful tool for collaboration, information sharing, and project coordination within your organization or team.
1. Nested Groups:
If your organization has complex communication structures, consider creating nested groups. These are groups within groups. For example, you can have a “Sales Department” group that includes subgroups like “North Region Sales” and “South Region Sales.” This hierarchical approach allows for better organization and targeted communication.
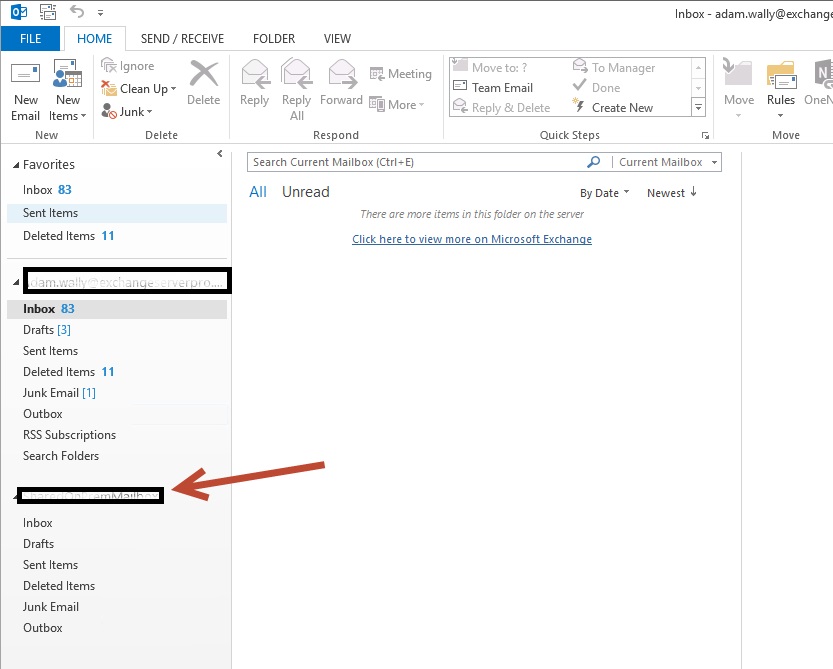
2. Shared Mailboxes:
In addition to group emails, Outlook offers shared mailboxes. These are useful for teams that need to manage email correspondence collectively but don’t require a dedicated email address. Shared mailboxes allow multiple