how to install npm
Node Package Manager, or npm, is a powerful tool for managing and sharing JavaScript libraries. Whether you’re a seasoned developer or just starting with JavaScript, understanding how to install npm is crucial. In this step-by-step guide, we’ll walk you through the process of installing npm on your system.
What is npm?
npm is the default package manager for Node.js, a popular JavaScript runtime. It allows developers to easily install, share, and manage dependencies for their projects. By using npm, you can access a vast ecosystem of packages and libraries that can significantly speed up your development process.
Step 1: Install Node.js
Before you can use npm, you need to have Node.js installed on your system. npm comes bundled with Node.js, so installing Node.js will automatically install npm.
Visit the official Node.js website (https://nodejs.org/) and download the latest LTS (Long Term Support) version for your operating system. Follow the installation instructions for your specific platform.
Step 2: Verify Installation
Once Node.js is installed, you can verify the installation by opening a command prompt or terminal and typing the following commands:
bashnode -vnpm -v
These commands should display the installed version numbers of Node.js and npm. If you see version numbers, it means both Node.js and npm are installed successfully.
Step 3: Updating npm (Optional)
npm is regularly updated to include new features and security patches. To ensure you have the latest version, you can update npm using the following command:
bash
npm install -g npm
This command updates npm to the latest version globally.
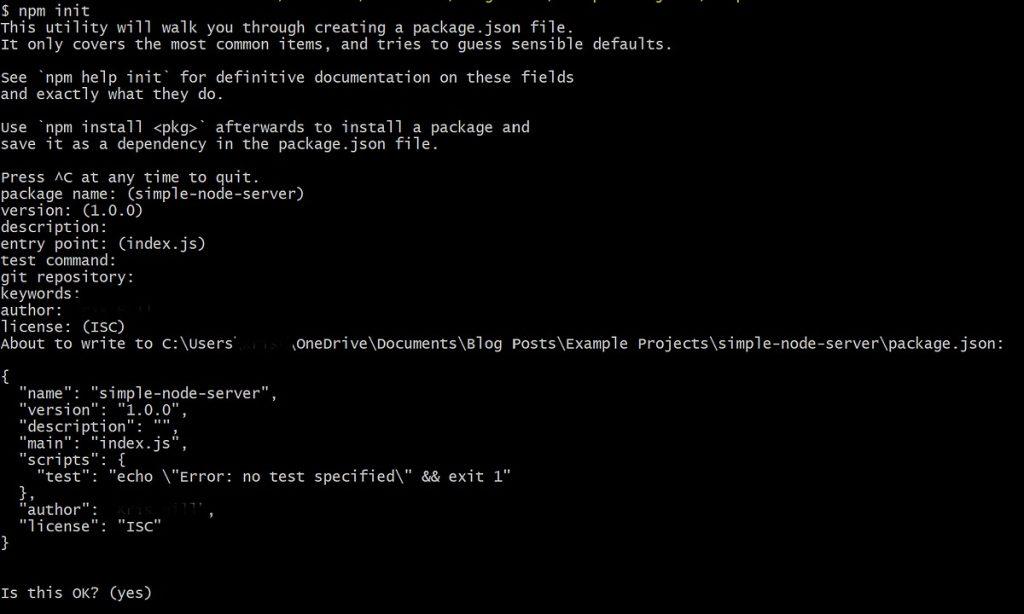
Step 4: Start Using npm
With npm installed, you can start using it to manage your project dependencies. Navigate to your project directory using the command prompt or terminal and run the following command to initialize a new package.json file:
bash
npm init
Follow the prompts to set up your project, and npm will create a package.json file for you.
Step 5: Installing Packages with npm
Now that you have npm set up, you can start installing packages for your projects. To install a package, use the following command:
bash
npm install package-name
Replace “package-name” with the name of the package you want to install. This command will download and install the specified package and its dependencies into your project.
Step 6: Managing Dependencies
As your project grows, managing dependencies becomes crucial. npm makes it easy to manage dependencies by providing commands to install, update, and remove packages. For example:
- To install a specific version of a package:
bash
-
npm install package-name@version
- To update a package to the latest version:
bash
-
npm update package-name
- To remove a package:
bash
-
npm uninstall package-name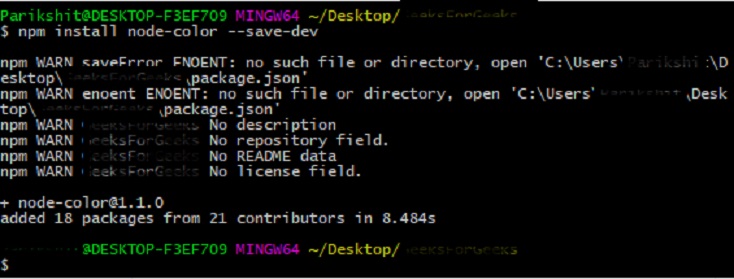
Step 7: Understanding the package.json File
The package.json file is the heart of your Node.js project. It contains metadata about your project and its dependencies. You can manually edit this file or use the npm command to create or update it. Be sure to review and update your
initpackage.json file as your project evolves.
Step 8: Exploring the npm Registry
npm hosts a vast registry of packages that you can explore at https://www.npmjs.com/. Here, you can discover new packages, read documentation, and learn more about the JavaScript ecosystem. When choosing packages for your projects, consider factors like popularity, maintenance, and community support.
Step 9: Troubleshooting Common Issues
If you encounter issues during the installation process, consider the following tips:
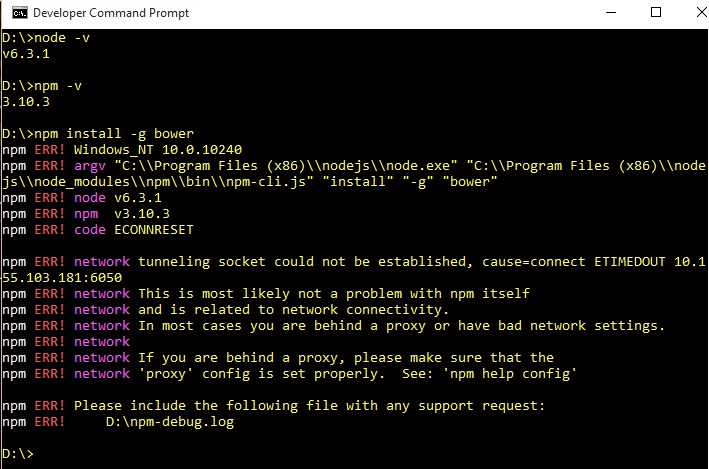
- Ensure you have the latest version of Node.js and npm.
- Check your internet connection and any proxy settings.
- If you encounter permission issues, use
sudoon Unix systems or run your command prompt as an administrator on Windows.
Step 10: Global vs. Local Packages
npm allows you to install packages globally, making them available across all your projects. This is useful for tools and libraries you use frequently. To install a package globally, use the -g flag:
bash
npm install -g package-name
Keep in mind that global packages may have different behavior and may not always be the best choice for project-specific dependencies.
Step 11: Scripting with npm
One powerful feature of npm is the ability to run scripts defined in your package.json file. You can use the scripts section to define custom commands for tasks like testing, building, or starting your application. For example, to run a custom script named “start,” use:
bash
npm start
Explore the world of npm scripts to automate common development tasks and improve your workflow.
Step 12: Semantic Versioning
Understanding semantic versioning (SemVer) is crucial when working with npm packages. Versions are typically written as MAJOR.MINOR.PATCH (e.g., 1.2.3). Follow these general rules when specifying package versions in your package.json:
- Use
^to allow updates that do not include breaking changes:"^1.2.3" - Use
~to allow only patch-level updates:"~1.2.3"
This ensures that your project gets the latest features and bug fixes without breaking existing functionality.
Step 13: Creating a Node.js Project
If you’re starting a new Node.js project, use the following steps:
- Create a new directory for your project:
mkdir my-node-project. - Navigate to the project directory:
cd my-node-project. - Initialize a new
package.jsonfile:npm init. - Follow the prompts to set up your project details.
- Install necessary dependencies:
npm.
install package-name
Step 14: Updating Node.js
Regularly updating Node.js is essential for security and performance. To update Node.js, you can use a version manager like nvm or n, which allows you to switch between different Node.js versions easily.
Step 15: Contributing to the npm Ecosystem
Consider contributing to the npm ecosystem by open-sourcing your own packages or participating in existing projects. Following best practices, writing clear documentation, and maintaining your packages can help build a positive developer community.
Step 16: Debugging and Profiling
npm provides built-in tools for debugging and profiling your Node.js applications. The npm audit command can help identify security vulnerabilities in your project’s dependencies. For debugging, consider using the --inspect flag when running your scripts to enable the Node.js inspector. Explore tools like ndb or node for more advanced debugging features.
--inspect
Step 17: Using npm Registry Mirrors
In some cases, you might experience slow download speeds from the default npm registry. To address this, you can use a mirror to fetch packages more quickly. Tools like npm set allow you to switch to a mirror easily. However, be cautious and ensure that the mirror is trustworthy and up to date.
registry
Step 18: Private npm Packages
If you’re working on a project that requires private packages, npm supports private registries. You can use npm’s paid service, npm Private Packages, or set up your own private registry using tools like Verdaccio. This is useful for proprietary code or sharing packages within your organization.
Step 19: Caching npm Packages
npm caches downloaded packages to improve installation speed. However, if you want more control over caching, you can set up a custom cache directory using the npm config command. This is especially helpful when working with continuous integration environments or in situations with limited internet access.
Step 20: Handling npm Scripts Cross-Platform
If you’re developing across different operating systems, be aware that certain npm scripts might behave differently. Consider using tools like cross-env to set environment variables in a cross-platform way. This ensures your npm scripts work consistently on Windows, macOS, and Linux.
Step 21: Advanced npm Scripting Techniques
Take advantage of npm script hooks, such as pre and post, to run scripts automatically before or after a particular npm script. This can be useful for tasks like cleaning up or preparing resources before running your main scripts.
Step 22: Managing npm Teams and Collaborators
For larger projects or organizations, npm provides the concept of teams. Teams allow you to manage access to packages and collaborate more effectively. You can add collaborators to your npm packages using the npm owner command.
Step 23: Integrating npm with Build Tools
Integrate npm seamlessly with popular build tools like Webpack, Gulp, or Grunt. These tools can enhance your development workflow by automating tasks such as bundling, minification, and transpilation.
Step 24: Checking for Outdated Packages
Keep your project up to date by regularly checking for outdated packages. The npm outdated command shows you which of your dependencies have newer versions available. This helps you stay current with the latest features and security patches.
Step 25: Scoped Packages
Scoped packages allow you to namespace your packages and avoid naming conflicts. When creating a new package, you can use your organization’s scope:
bash
npm init --scope=your-organization
This results in a package name like @your-organization/package-name. Scoped packages are particularly useful for larger projects or organizations managing multiple packages.
Step 26: Yarn as an Alternative
While npm is the default package manager for Node.js, Yarn is another popular alternative. Yarn offers deterministic dependency resolution and a faster installation process. You can try Yarn by installing it globally:
bash
npm install -g yarn
After installation, you can use yarn in place of npm in your projects.
Step 27: Locking Package Versions
To ensure consistent behavior across different environments, use a package-lock.json file. This file locks down the versions of your project’s dependencies. It can be generated automatically by running:
bash
npm install
This is crucial for maintaining consistent builds, especially when collaborating with others.
Step 28: npm Audit for Security
Security is paramount in software development. Utilize the npm command to check for vulnerabilities in your project’s dependencies. If vulnerabilities are detected, npm provides guidance on how to address them. Regularly run audits to keep your project secure.
audit
Step 29: Publishing Your Own npm Package
If you’ve created a useful JavaScript library or tool, consider sharing it with the community by publishing it on npm. Use the following steps:
- Create an Account: Sign up for an npm account on https://www.npmjs.com/.
- Login: Use the
npm logincommand to log in with your credentials. - Publish: After creating your package, use
npm publishto share it with the world.
Remember to follow best practices for versioning and document your package thoroughly.
Step 30: Leveraging npm Scripts for Automation
npm scripts are powerful for automating tasks, but they can also be utilized for more advanced workflows. Consider using tools like concurrently to run multiple scripts concurrently or npm-run-all for running scripts in parallel or sequentially.
Step 31: Debugging npm Scripts
When debugging npm scripts, it can be challenging to pinpoint issues. Use the --dry-run flag to see what commands would be executed without actually running them. This is especially helpful for complex scripts.
Step 32: Cleaning npm Cache
Over time, the npm cache can accumulate a large number of files. To free up space or troubleshoot installation issues, you can clean the cache using:
bash
npm cache clean --force
This command removes all data from the cache.
Step 33: Handling Version Conflicts
If you encounter version conflicts or inconsistencies in your project, use the npm dedupe command to deduplicate your dependencies. This can help resolve issues related to nested dependencies.
You’ve now explored an extensive array of advanced npm techniques, from security measures to publishing your packages. npm is a versatile tool that continues to evolve, and staying informed about its capabilities will empower you as a developer.
As you navigate the npm ecosystem, remember to stay engaged with the developer community, explore new tools, and always be open to adopting best practices.
Congratulations! You’ve now explored advanced techniques and best practices for working with npm. As you continue to build and maintain your projects, stay curious and explore the ever-evolving landscape of JavaScript development.
Remember, npm is a versatile tool that can adapt to various project requirements. By mastering its advanced features, you’ll enhance your ability to create robust, efficient, and secure applications.
By following these advanced steps, you’ve not only installed npm but also gained insights into the more nuanced aspects of package management in the JavaScript ecosystem. As you continue your journey with Node.js and npm, don’t hesitate to explore further, experiment with different packages, and stay engaged with the vibrant npm community.
Mastering npm is a valuable skill for any JavaScript developer. With npm, you can streamline your development workflow, leverage a rich ecosystem of packages, and stay up-to-date with the latest tools and libraries. As you delve deeper into npm, explore advanced features like scripts, versioning, and publishing your own packages.
Remember, npm is not just a package manager; it’s a community-driven platform that fosters collaboration and innovation. Embrace the power of npm, and it will undoubtedly enhance your JavaScript development journey.
Congratulations! You have successfully installed npm on your system. Now you can take advantage of the vast npm registry to easily add and manage dependencies for your JavaScript projects. Remember to regularly update your dependencies to benefit from the latest features and security patches.