How to install java
Java, a versatile and powerful programming language, is widely used for building applications, ranging from web development to mobile apps. In this detailed guide, we will walk you through the step-by-step process of how to install java on your system.
Why Java?
Before we dive into the installation steps, let’s briefly discuss why Java is a popular choice for developers:
- Platform Independence: Java applications can run on any device with a Java Virtual Machine (JVM), providing remarkable platform independence.
- Robust Libraries: Java offers a vast array of libraries and frameworks that streamline development tasks and enhance productivity.
- Scalability: Java is known for its scalability, making it suitable for both small-scale applications and large, enterprise-level systems.
Now, let’s get started with installing Java on your machine.
Step 1: Verify if Java is Already Installed
Before proceeding with the installation, check if Java is already installed on your system. Open a command prompt or terminal and type:
bash
java -version
If Java is installed, you’ll see the version number. If not, proceed to the next step.
Step 2: Download the Java Development Kit (JDK)
Visit the official Oracle website to download the Java Development Kit (JDK), which includes the Java Runtime Environment (JRE) along with development tools.
Choose the appropriate version for your operating system (Windows, macOS, or Linux) and click on the download link.
Step 3: Run the Installer
Once the download is complete, run the installer. During the installation process, you may be prompted to choose the installation directory and configure other settings. Follow the on-screen instructions to complete the installation.
Step 4: Set Java Environment Variables (Optional)
To ensure that Java is accessible from any command prompt or terminal, you might need to set the Java environment variables. This step is usually done automatically by the installer, but you can check by looking for a JAVA_HOME variable in your system environment variables.
Step 5: Verify the Installation
Open a new command prompt or terminal and type the following commands to verify the installation:
bashjava -versionjavac -version
These commands should display the installed Java version and the Java Compiler version. If you see the version information, Java has been successfully installed on your system.
Step 6: Install Integrated Development Environment (IDE) – Optional
While you can write and compile Java code using a simple text editor, using an Integrated Development Environment (IDE) such as Eclipse, IntelliJ IDEA, or NetBeans can greatly enhance your development experience. Choose an IDE based on your preferences and download it from the respective official website.
Congratulations! You have successfully installed Java on your system. Whether you are a beginner taking your first steps in programming or an experienced developer adding Java to your skill set, you have laid the foundation for creating robust and scalable applications.
As you continue your journey with Java, explore its rich ecosystem, participate in the vibrant developer community, and consider taking on projects that showcase the language’s versatility.
Step 7: Understanding Java Versions and Updates
Java often releases updates to enhance security and add new features. Regularly check for the latest Java version and updates. You can do this by visiting the official Java download page or using package managers on Linux systems.
Step 8: Configuring Multiple Java Versions (Optional)
In some cases, you may need to work with multiple Java versions on your system. Tools like update-alternatives on Linux or third-party tools on Windows and macOS allow you to switch between different Java versions easily. This is particularly useful for projects that require specific Java versions.
Step 9: Setting Up Java on macOS Using Homebrew
If you’re on macOS and prefer using Homebrew, you can install Java using the following commands:
bashbrew tap homebrew/cask-versionsbrew install --cask adoptopenjdk8
Replace adoptopenjdk8 with the version you desire. Homebrew simplifies the installation process and offers an organized way to manage packages.
Step 10: Exploring Java Build Tools
As your Java projects grow, you may find build tools like Apache Maven or Gradle beneficial. These tools help manage dependencies, compile code, and package your projects efficiently. You can install Maven using:
bash
brew install maven
Or on Linux:
bash
sudo apt-get install maven
Step 11: Java and Web Development
Java is extensively used in web development. If you’re interested in building web applications, consider exploring frameworks like Spring Boot or JavaServer Faces (JSF). These frameworks simplify the development of robust and scalable web applications.
Step 12: Debugging Java Applications
Learn about debugging Java applications using Integrated Development Environments (IDEs) like Eclipse or IntelliJ IDEA. These tools provide powerful debugging features, allowing you to step through code, set breakpoints, and inspect variables during runtime.
Step 13: Advanced Java Topics – Multithreading and Concurrency
As you progress in your Java journey, delve into advanced topics like multithreading and concurrency. Understanding these concepts is crucial for developing high-performance applications.
Step 14: Contributing to the Java Community
Consider contributing to the Java community through forums, open-source projects, or writing documentation. Engaging with the community not only helps others but also enhances your understanding of Java.
Congratulations! You’ve completed the installation of Java and explored additional facets of the language. Java’s robustness, scalability, and versatility make it a powerful tool for a wide range of applications.
As you continue your Java development journey, stay curious, explore advanced topics, and remain engaged with the ever-growing Java community. The skills you’ve acquired will empower you to tackle complex projects and contribute meaningfully to the world of Java development.
how to install java in mac
Java, a powerful and versatile programming language, is widely used for developing applications across various domains. If you’re a macOS user and eager to get started with Java, this step-by-step guide will walk you through the process of installing Java on your Mac.
Why Java?
Before we begin the installation process, let’s briefly understand why Java is a preferred choice for many developers:
- Platform Independence: Java applications can run on any device with a Java Virtual Machine (JVM), providing remarkable platform independence.
- Vast Ecosystem: Java offers a rich ecosystem of libraries and frameworks, making it suitable for a wide range of applications.
- Community Support: A large and active Java community ensures that you can find resources, tutorials, and assistance easily.
Now, let’s proceed with installing Java on your macOS.
Step 1: Verify Java Installation (Optional)
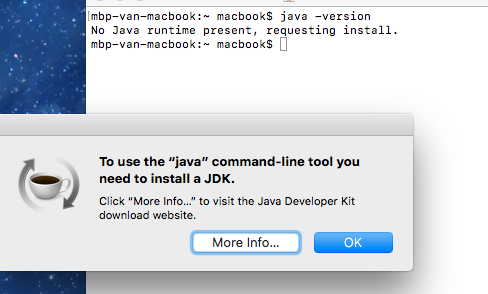
Before installing Java, check if it’s already installed on your Mac. Open the Terminal and type the following command:
bash
java -version
If Java is installed, you’ll see the version information. If not, proceed to the next step.
Step 2: Download the Java Development Kit (JDK)
Visit the official Oracle website or AdoptOpenJDK to download the Java Development Kit (JDK). For simplicity, we’ll use AdoptOpenJDK in this guide. Follow these steps:
- Navigate to https://adoptopenjdk.net/.
- Choose the version of Java you’d like to install (e.g., OpenJDK 11 or 17).
- Select “HotSpot” as the JVM.
- Click the “Latest Release” button.
- Download the macOS installer package (
.pkg).
Step 3: Run the Installer
Once the download is complete, locate the downloaded .pkg file and double-click it to run the installer. Follow the on-screen instructions to complete the installation.
Step 4: Verify Java Installation
After the installation, verify that Java is correctly installed by opening the Terminal and typing:
bash
java -version
You should see the version information of the installed Java. Additionally, you can check the Java Compiler version:
bash
javac -version
Step 5: Set Java Environment Variables (Optional)
In most cases, macOS sets the necessary environment variables automatically. However, if you encounter issues, you may need to set them manually. Open the Terminal and edit your profile configuration file, such as ~/.bash_profile or ~/.zshrc, to include:
bashexport JAVA_HOME=$(/usr/libexec/java_home)export PATH=$JAVA_HOME/bin:$PATH
Save the file and restart the Terminal for the changes to take effect.
Congratulations! You’ve successfully installed Java on your macOS. Whether you’re a beginner exploring programming or an experienced developer incorporating Java into your toolkit, you’re now equipped to start building Java applications on your Mac.
As you continue your journey with Java, consider exploring Java development tools, frameworks, and contributing to the Java community. The world of Java programming is vast, and your newfound skills open doors to countless possibilities.
how to install java in linux
Java, a powerful and versatile programming language, is widely used for developing applications across various domains. If you’re a macOS user and eager to get started with Java, this step-by-step guide will walk you through the process of installing Java on your Mac.
Why Java?
Before we begin the installation process, let’s briefly understand why Java is a preferred choice for many developers:
- Platform Independence: Java applications can run on any device with a Java Virtual Machine (JVM), providing remarkable platform independence.
- Vast Ecosystem: Java offers a rich ecosystem of libraries and frameworks, making it suitable for a wide range of applications.
- Community Support: A large and active Java community ensures that you can find resources, tutorials, and assistance easily.
Now, let’s proceed with installing Java on your macOS.
Step 1: Verify Java Installation (Optional)
Before installing Java, check if it’s already installed on your Mac. Open the Terminal and type the following command:
bash
java -version
If Java is installed, you’ll see the version information. If not, proceed to the next step.
Step 2: Download the Java Development Kit (JDK)
Visit the official Oracle website or AdoptOpenJDK to download the Java Development Kit (JDK). For simplicity, we’ll use AdoptOpenJDK in this guide. Follow these steps:
- Navigate to https://adoptopenjdk.net/.
- Choose the version of Java you’d like to install (e.g., OpenJDK 11 or 17).
- Select “HotSpot” as the JVM.
- Click the “Latest Release” button.
- Download the macOS installer package (
.pkg).
Step 3: Run the Installer
Once the download is complete, locate the downloaded .pkg file and double-click it to run the installer. Follow the on-screen instructions to complete the installation.
Step 4: Verify Java Installation
After the installation, verify that Java is correctly installed by opening the Terminal and typing:
bash
java -version
You should see the version information of the installed Java. Additionally, you can check the Java Compiler version:
bash
javac -version
Step 5: Set Java Environment Variables (Optional)
In most cases, macOS sets the necessary environment variables automatically. However, if you encounter issues, you may need to set them manually. Open the Terminal and edit your profile configuration file, such as ~/.bash_profile or ~/.zshrc, to include:
bashexport JAVA_HOME=$(/usr/libexec/java_home)export PATH=$JAVA_HOME/bin:$PATH
Save the file and restart the Terminal for the changes to take effect.
Congratulations! You’ve successfully installed Java on your macOS. Whether you’re a beginner exploring programming or an experienced developer incorporating Java into your toolkit, you’re now equipped to start building Java applications on your Mac.
As you continue your journey with Java, consider exploring Java development tools, frameworks, and contributing to the Java community. The world of Java programming is vast, and your newfound skills open doors to countless possibilities.
A Comprehensive Guide: Installing Java on Linux
Java, a versatile and powerful programming language, finds extensive use in various applications, from web development to enterprise-level systems. If you’re a Linux user eager to delve into Java development, this step-by-step guide will walk you through the process of installing Java on your Linux distribution.
Why Java?
Before we embark on the installation journey, let’s take a moment to understand why Java is a preferred language for many developers:
- Platform Independence: Java applications can run on any device with a Java Virtual Machine (JVM), ensuring remarkable platform independence.
- Rich Ecosystem: Java boasts a vast ecosystem of libraries and frameworks, making it suitable for a wide range of applications.
- Community Support: The active Java community ensures easy access to resources, tutorials, and support.
Now, let’s proceed with installing Java on your Linux system.
Step 1: Verify Java Installation (Optional)
Before installing Java, it’s good practice to check if it’s already installed. Open a terminal and type the following command:
bash
java -version
If Java is installed, you’ll see the version information. If not, proceed to the next step.
Step 2: Choose the Right Java Version
Linux offers various Java distributions, and you can choose one based on your preferences. Common choices include OpenJDK and Oracle JDK. For this guide, we’ll use OpenJDK, which is open-source and widely adopted.
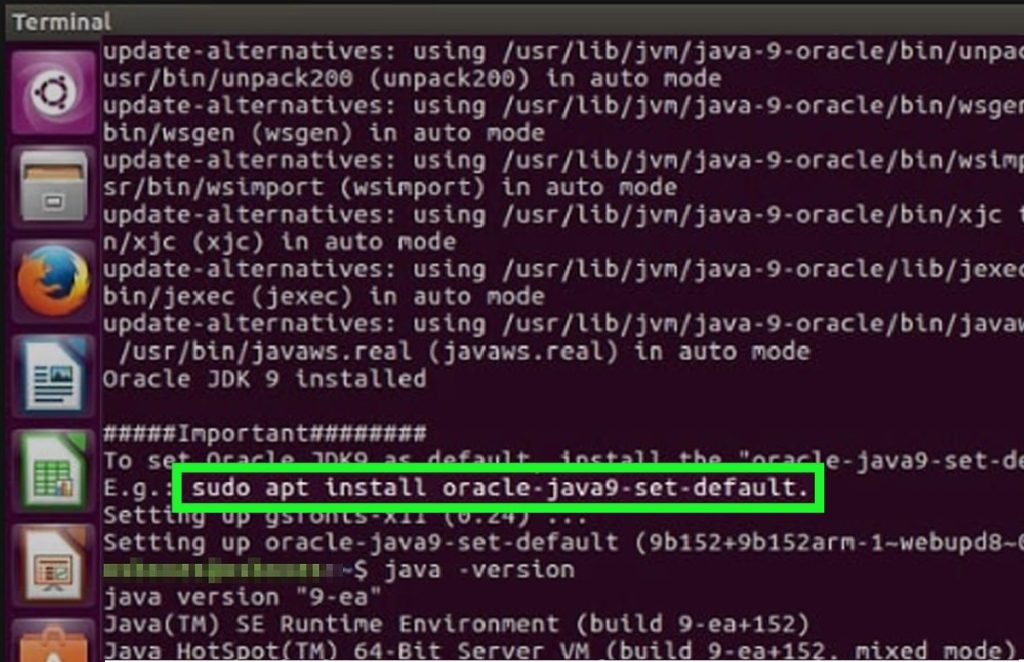
Step 3: Install OpenJDK
On Debian-based Systems (e.g., Ubuntu):
bashsudo apt updatesudo apt install default-jdk
On Red Hat-based Systems (e.g., Fedora):
bash
sudo dnf install java-11-openjdk
Step 4: Verify Java Installation
After installation, verify that Java is correctly installed by typing:
bash
java -version
You should see the version information. Additionally, check the Java Compiler version:
bash
javac -version
Step 5: Set Java Environment Variables (Optional)
Linux systems usually handle environment variables well. However, if you encounter issues, you may need to set them manually. Open your shell configuration file (e.g., ~/.bashrc, ~/.zshrc) and add:
bashexport JAVA_HOME=/usr/lib/jvm/default-javaexport PATH=$PATH:$JAVA_HOME/bin
Save the file and run:
bash
source ~/.bashrc  # or source ~/.zshrc
Congratulations! You’ve successfully installed Java on your Linux system. Whether you’re a Linux enthusiast exploring programming or a seasoned developer incorporating Java into your toolkit, you’re now ready to embark on the journey of Java development.
As you continue your exploration of Java on Linux, consider diving into Java development tools, frameworks, and contributing to the vibrant Java community. The world of Java programming is diverse, and your newfound skills open doors to a myriad of possibilities.
how to install java in windows
Step 1: Verify Java Installation (Optional)
Before installing Java, it’s good practice to check if it’s already installed. Open a Command Prompt and type the following command:
bash
java -version
If Java is installed, you’ll see the version information. If not, proceed to the next step.
Step 2: Download the Java Development Kit (JDK)
Visit the official Oracle website or AdoptOpenJDK to download the Java Development Kit (JDK). For simplicity, we’ll use AdoptOpenJDK in this guide. Follow these steps:
- Navigate to https://adoptopenjdk.net
- Choose the version of Java you’d like to install (e.g., OpenJDK 11 or 17).
- Select “HotSpot” as the JVM.
- Choose the “x64” version for 64-bit Windows or “x86” for 32-bit Windows.
- Click the “Latest Release” button.
- Download the Windows installer (
.msi).
Step 3: Run the Installer
Once the download is complete, locate the downloaded .msi file and double-click it to run the installer. Follow the on-screen instructions to complete the installation.
Step 4: Set Java Environment Variables (Optional)
In most cases, Windows sets the necessary environment variables automatically. However, if you encounter issues, you may need to set them manually. Right-click on “This PC” or “My Computer” and choose “Properties.” Then, click on “Advanced system settings” and then “Environment Variables.” Add a new system variable:
- Variable Name:
JAVA_HOME - Variable Value:
C:\Program(Adjust the version number based on your installation)
Files\AdoptOpenJDK\jdk-11.0.12.7-hotspot
Edit the Path variable and add %JAVA_HOME%\bin at the end.
Step 5: Verify Java Installation
After the installation, verify that Java is correctly installed by opening a Command Prompt and typing:
bash
java -version
You should see the version information of the installed Java. Additionally, check the Java Compiler version:
bash
javac -version